How Roof Leaks Are Found: Moisture Meters and Thermal Imaging
See how pros trace roof leaks to the true source with moisture meters, thermal imaging, and water testing — instead of guessing and patching.
You know the frustration of staring at a growing water stain on the ceiling. Our team sees this exact scenario constantly in homes across the US.
The stain you see is just the end of the line. We find that chasing the drip location directly above the stain is usually a losing strategy.
Here is how professional roof leak detection actually works to identify the true problem.
Why patching doesn’t work
Patching the ceiling stain fails because it only blocks the exit point, ignoring the actual roof breach located feet away. Our team frequently sees homeowners seal over a damp spot, only to have the leak reappear nearby. Water simply follows the path of least resistance through your building materials.
Recent 2026 data from Palm Build shows the national average for water damage restoration is $3,867. We know that unresolved moisture quickly rots out framing and ruins expensive insulation. The stain on your ceiling is merely the final stop.
Water travels along hidden pathways before dropping onto your ceiling:
- Under asphalt shingles and along the waterproof underlayment
- Down a rafter, jumping between structural framing members
- Along the shaft of a roofing nail into the living space
- Through gaps in the ceiling drywall until it pools
The four-stage detection process
A systematic detection process isolates the water entry point by working backward from the interior stain to the exterior roof deck. We rely on a four-stage method to find the roof leak source accurately.
Stage 1: Interior assessment
Start exactly where the water stain shows on the ceiling. Our inspectors note the precise position and check for other signs of moisture.
You should look for damp patches on adjacent walls, peeling paint, or a musty odor. We use these initial clues to map out the likely trajectory of the water.
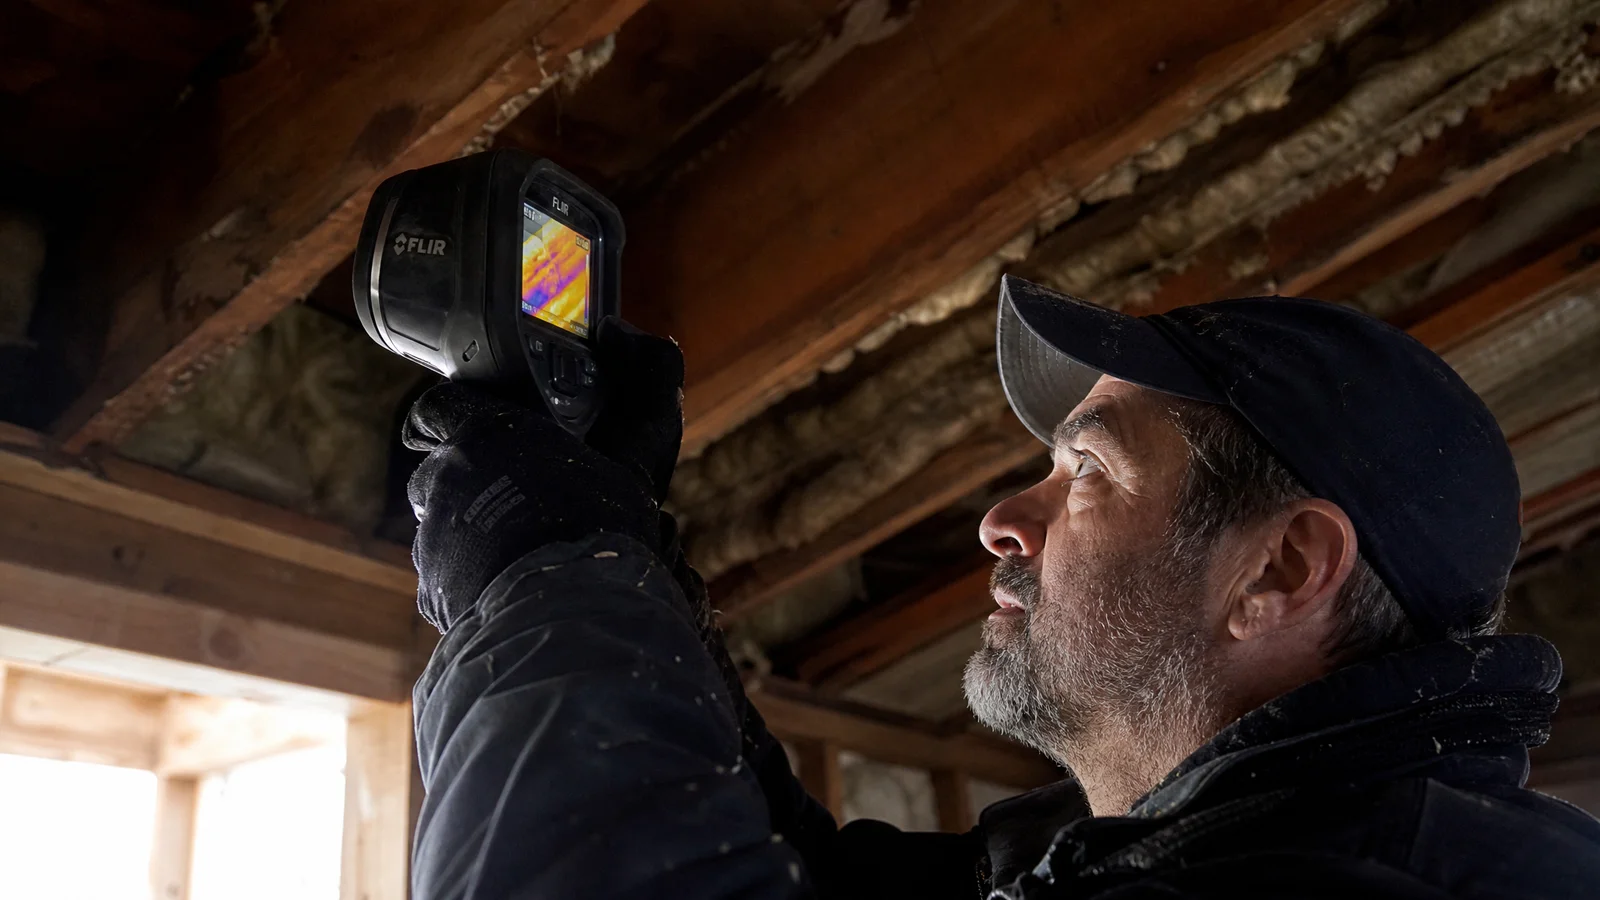
Stage 2: Attic inspection with meters and thermal
Moving into the attic space above the stain reveals the hidden water path. Our technicians bring specialized diagnostic tools to scan the insulation and wood framing. Damp insulation reads noticeably cooler on a thermal camera due to evaporation.
The inspection relies on three specific methods to track the moisture.
- Flashlight scan: We look for obvious wet insulation, water stains on rafters, or daylight shining through the roof deck.
- Moisture meter: Technicians use pin and pinless meters to verify the exact water content in the wood sheathing.
- Thermal imaging camera: Our team spots hidden temperature differentials that show exactly where water is pooling.
Stage 3: Roof-side trace
Finding the interior moisture tells us exactly where to look on the roof. Our crew heads outside and works up-slope from the attic wet spot. Water typically enters within a few feet of the interior drip, though complex roofs can carry it further.
We thoroughly inspect the highest-risk areas for failure.
- Flashing around nearby chimneys, walls, and skylights
- Pipe boots and roof vents, which cost around $250 to $550 to repair according to 2026 Angi data
- Missing or damaged asphalt shingles up-slope from the stain
- Valleys running through the suspect area
- Nail pops protruding through the shingle field
Stage 4: Water test (when needed)
Some leaks remain invisible until the exact weather conditions are recreated. Our team runs water on the roof in a controlled, systematic way to force the leak to show itself.
The process starts low on the roofline and moves slowly upward. Another technician watches the interior source from the attic. We know we have found the entry point the moment water appears inside.
What thermal imaging shows
Thermal imaging cameras display temperature differences across your ceiling and roof, highlighting hidden water pockets as cool spots. We use FLIR (Forward-Looking InfraRed) technology to see the invisible paths water takes through your home.
This technology is a complete game changer for accurate diagnostics. Our cameras catch the subtle heat signature changes that happen when building materials get wet. Damp materials evaporate moisture and appear blue or black on the screen.
We can literally trace the water path behind your drywall without tearing anything open. These camera images become a permanent part of the report you keep.
A thermal imaging roof leak scan typically reveals:
- Trapped moisture in ceiling insulation (shows as cooler patches)
- Water tracking actively along rafters (shows as linear cool paths)
- Compromised roof decking (displays irregular temperature anomalies)
- Missing insulation gaps (shows distinct thermal variations)
- Hidden air leaks that allow condensation to form
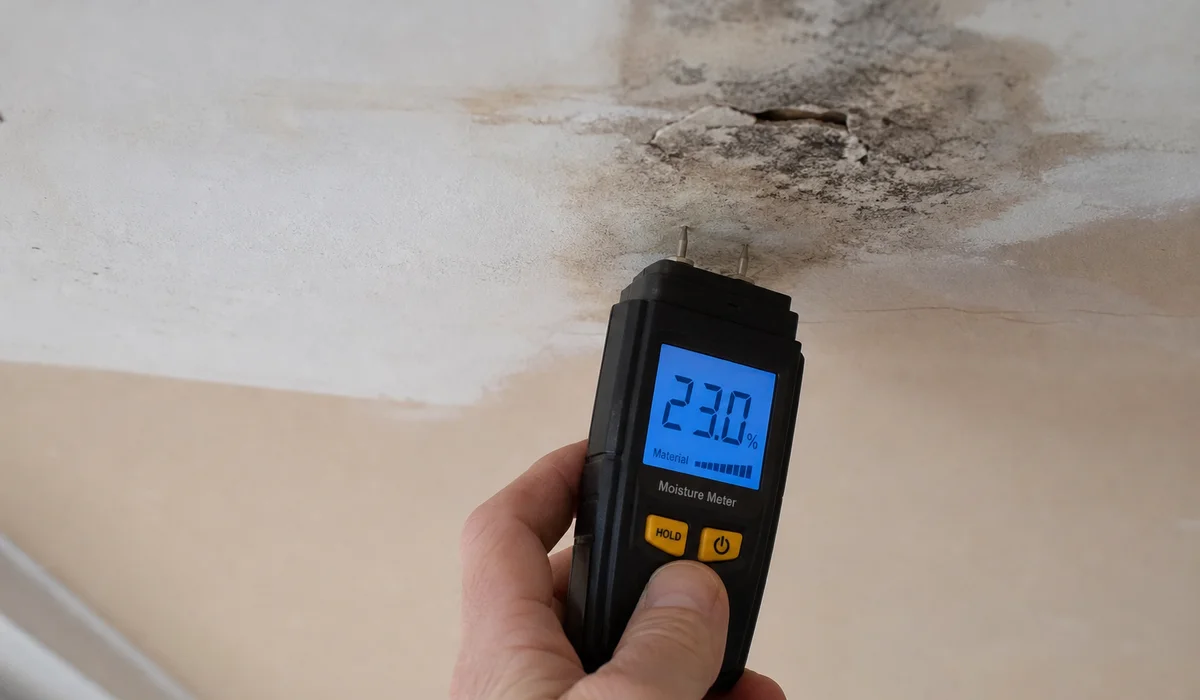
What moisture meters add
Moisture meters provide concrete, objective percentages of water content in your building materials to confirm what the thermal camera sees. We rely on these exact readings to determine how far the water damage has actually spread.
While thermal cameras show temperature changes, moisture meters confirm the actual presence of water. Our technicians carry two distinct types of meters to perform a complete inspection. Pinless meters use electromagnetic waves to scan up to 1.5 inches deep into drywall without causing any damage.
We then use pin meters to measure the exact electrical resistance in the raw wood framing.
| Meter Type | How It Works | Best Use Case |
|---|---|---|
| Pinless Meter | Uses dielectric scans to read up to 1.5 inches deep | Quickly scanning finished drywall without causing damage |
| Pin Meter | Measures electrical resistance between two metal probes | Getting exact moisture percentages in exposed attic framing |
This dual-tool approach gives you a clear picture of the problem. Our readings tell you exactly what needs replacing and what can simply dry out.
Why this beats guessing
Systematic detection isolates the exact entry point of the leak, preventing costly, repeated repairs that fail to stop the water. We use hard data to fix the actual problem rather than just covering up the visible symptoms.
A 2026 Angi report notes that untreated roof damage can escalate into $13,000 structural repairs if left alone. Our diagnostic process prevents that kind of catastrophic damage from happening to your home. Guessing usually results in applying sealant to the wrong spot on the roof.
We see leaks return in three months because the original entry point was never actually sealed.
Guessing leads to a cycle of frustration:
- Applying expensive sealant to the wrong roof penetration
- The exact same leak returning after the next heavy rain
- Paying for repeated repair visits from different contractors
- Interior mold and rot growing steadily between service calls
A systematic detection approach provides permanent value:
- One accurate, data-driven diagnosis
- One highly targeted exterior repair
- A reliable, leak-free warranty
- The chance for your interior to finally dry out completely
When to call
You should call for a professional evaluation if a previously repaired leak returns or if a damp spot only appears during specific wind patterns. We know that simply sealing over a stain is never a permanent fix.
A persistent leak is a strong signal that water is entering far up the roofline. Our team handles these exact scenarios with precision thermal scanning and moisture mapping.
See our roof leak detection and repair service for what a full diagnostic covers. We are ready to help you stop the damage before it spreads. You can request a free estimate with a leak to investigate right now.
Frequently Asked Questions
Why not just patch where it drips? ▼
Water travels along the roof deck before dropping out. The visible drip is rarely above the actual entry point. Patching the drip location doesn't fix the leak.
Does thermal imaging always work? ▼
It's highly effective for finding trapped moisture in insulation, drywall, and decking. Works best paired with moisture meter confirmation and water testing to find the actual roof-side entry.
How long does leak detection take? ▼
Most detections take 30–90 minutes on site. Complex leaks with multiple sources can take longer, and occasionally we need a return visit during rain to confirm.
Ready to talk to a roofer?
Read about our roof leak detection & repair service or get a free estimate.
Related Guides
Ceiling Water Stains: What They Tell You About Your Roof
A ceiling water stain often means a roof leak. Learn to read stain patterns, trace them to the source, and act before mold sets in.
Missing or Damaged Shingles: What They Mean
Missing or damaged shingles raise leak risk fast. Learn the causes, whether they can be matched, and when they signal a bigger roof problem.
Roof Leak Repair vs. Replacement: When a Leak Means a New Roof
When does a roof leak mean a full replacement? Compare isolated vs. systemic leaks, decking damage, and roof age to make the right call.
Why Is My Roof Leaking? Common Causes
Roof leaks usually trace to flashing failure, cracked boots, missing shingles, ice dams, or clogged valleys. Learn the top causes for CT homes.