The Roof Replacement Process, Step by Step
From inspection and tear-off to underlayment, shingles, and cleanup — see exactly what happens during a roof replacement in Newington, CT.
You know how disruptive a major home project can feel, especially when contractors leave your property in disarray. Our crews follow a tight system to replace a standard Newington single-family roof in just two working days.
The difference between a stressful ordeal and a smooth operation comes down to understanding the roof replacement process.
We break down exactly what happens from the initial tear-off to the final walkthrough in this guide. You can review the facts behind each phase and see typical timelines here.
Step 1: Free on-site inspection and estimate
Before any shingles come off, the initial inspection maps out the exact condition and dimensions of your roof. Our estimators climb up to photograph every detail and document existing damage. This physical inspection is paired with EagleView aerial 3D modeling, which 2026 data shows is 98.7% accurate for measurements. We utilize this precise technology to prevent costly material overages and save you money.
The resulting itemized estimate specifies exact costs for tear-off, materials, and disposal. You will see exact specifications for:
- Tear-off labor and dumpster fees
- Material quantities and specific brands
- Ice-and-water shield coverage areas
- Ventilation upgrades and final cleanup protocols
Step 2: Material selection and scheduling
Choosing the right shingle dictates the lifespan and weather resistance of your new roof. Our project managers help you review architectural and designer options to find the best fit. Top 2026 flagship products like GAF Timberline HDZ offer great value with their infinite wind-speed warranty. We coordinate with suppliers to secure your materials and lock in the installation date. Wait times in Connecticut generally range from two to six weeks depending on seasonal demand.
| Top 2026 Shingle Options | Algae Protection | Wind Warranty Limit |
|---|---|---|
| GAF Timberline HDZ | 25-Year StainGuard Plus | No Maximum Speed Limit |
| Owens Corning Duration | 10-Year StreakGuard | 130 MPH |
Step 3: Site prep on install morning
Protecting your property is the absolute first priority on installation day. Our crews arrive early to secure the perimeter before a single old shingle falls. Specialized equipment catches falling debris before it ever touches the ground. We follow a strict setup phase that includes:
- Tarping all delicate landscaping, AC units, and shrubs.
- Deploying an Equipter RB4000 roof buggy to catch waste right at the eaves.
- Setting up safety rigging and staging ladders carefully.
- Covering attic vents from the inside to stop dust from raining into your home.
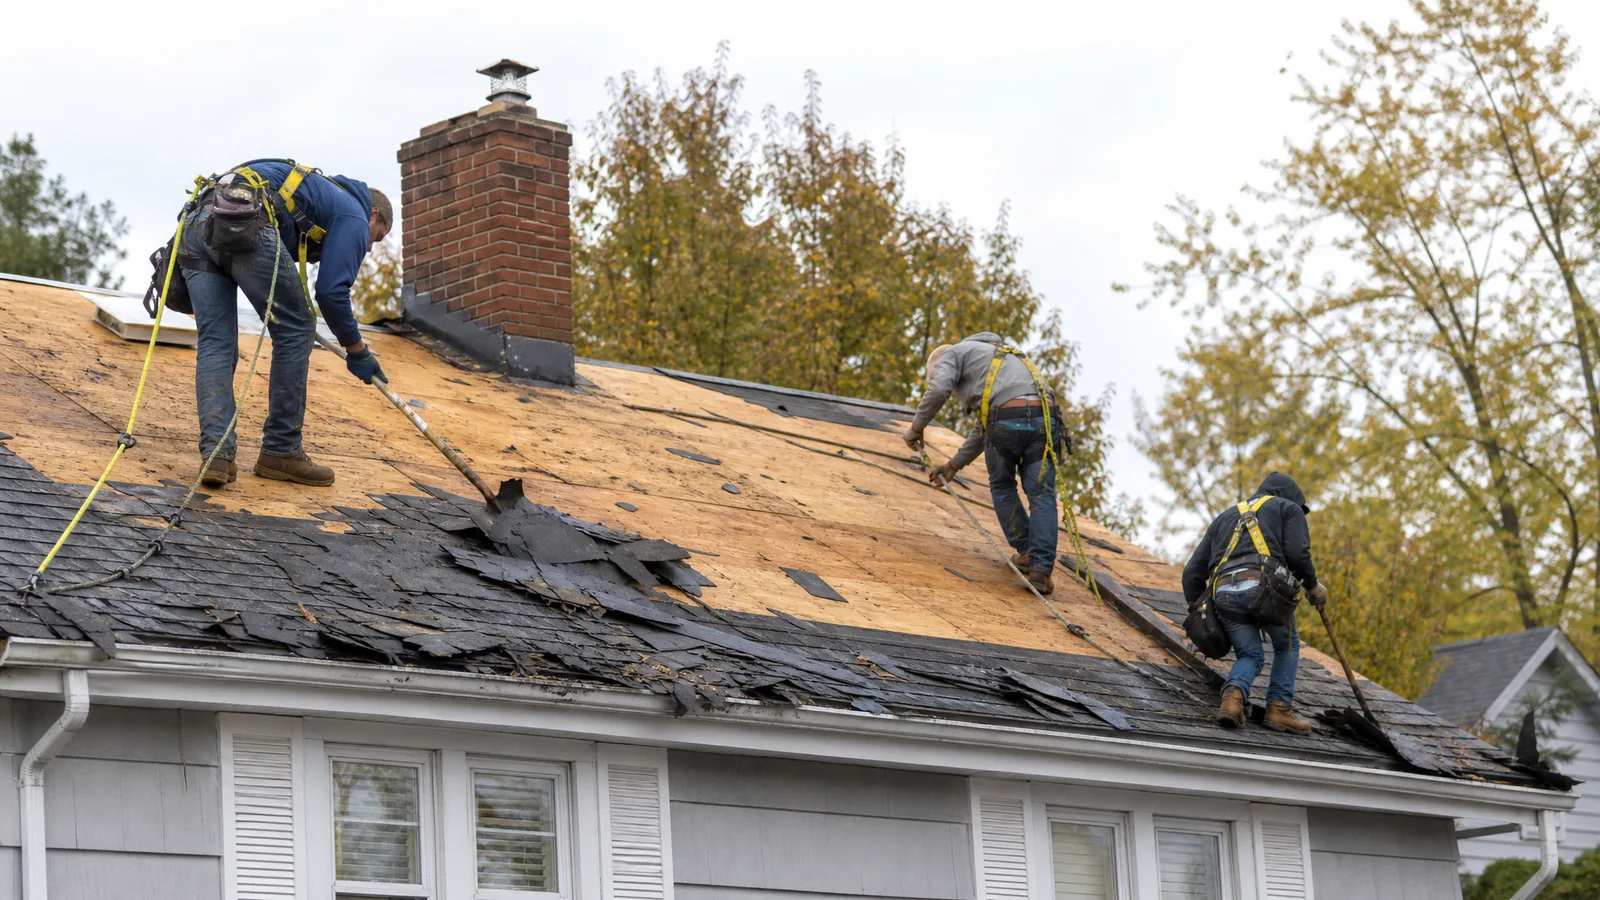
Step 4: Full tear-off
The removal phase strips the roof down to the bare wooden decking so the structural foundation can be evaluated. Our installers strip away the old shingles and underlayment rapidly. A typical 20-square asphalt roof generates roughly 5,000 pounds, or 2.5 tons, of dense waste. We manage this heavy debris using the Equipter RB4000. Its 4,000-pound capacity container lifts 12 feet in the air, allowing workers to pitch trash straight in rather than throwing it on your lawn.
| Roof Size (Squares) | Estimated Debris Weight | Average Dumpster Needed |
|---|---|---|
| 15 Squares | 3,750 lbs (1.8 Tons) | 10-Yard to 15-Yard |
| 20 Squares | 5,000 lbs (2.5 Tons) | 15-Yard |
| 30 Squares | 7,500 lbs (3.7 Tons) | 20-Yard |
Understanding how roof replacement works means expecting loud, dusty conditions as thousands of pounds of material come down. Our clients often choose to run errands until the noise subsides around lunchtime.
Step 5: Decking inspection and repair
A secure roof requires a solid wooden foundation to hold the new nails. Our carpenters walk every square foot of the exposed decking to test for soft spots, rot, or delamination. This thorough inspection is the biggest advantage of a complete tear-off, as a roof-over hides dangerous structural flaws.
We photograph any compromised wood and replace it immediately. A standard 7/16-inch OSB (Oriented Strand Board) sheet costs between $30 and $50 in 2026, making it a very affordable fix for long-term structural integrity.
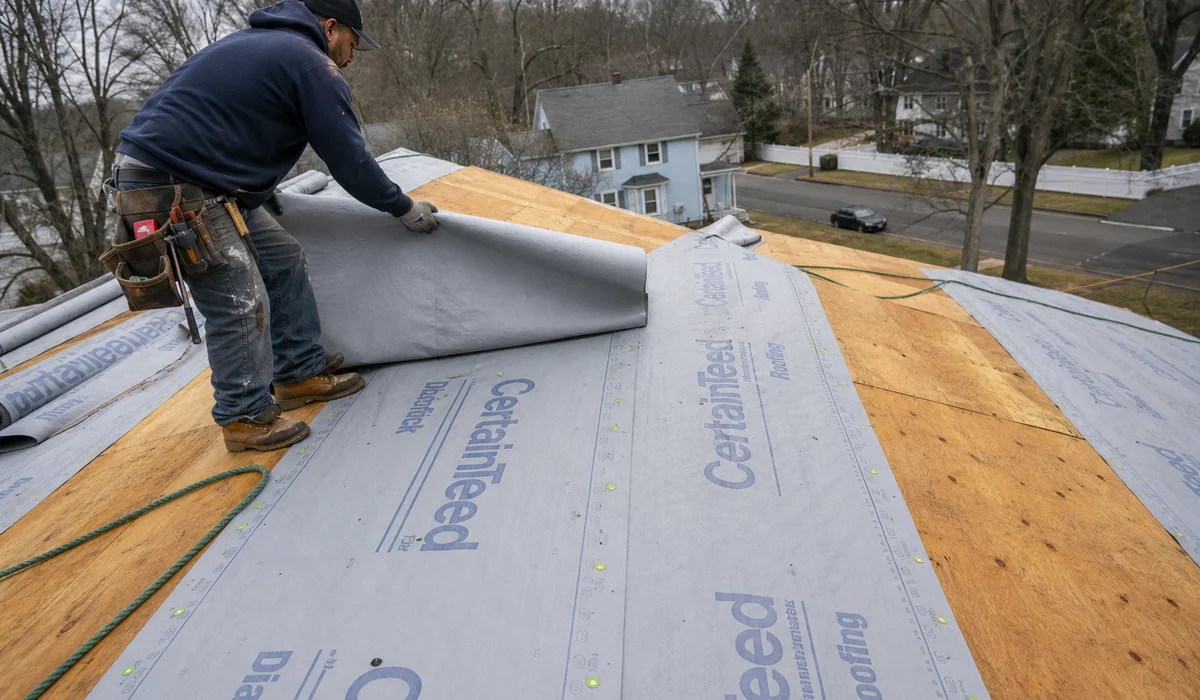
Step 6: Ice-and-water shield and underlayment
Waterproofing begins at the most vulnerable leak points. Our installers lay down a self-sealing ice-and-water shield first. Connecticut building codes strictly require this barrier to extend at least 24 inches past the interior wall line to defend against winter ice dams. We rely on premium membranes like Grace Ice & Water Shield for maximum protection. This aggressive barrier goes on several key areas:
- Along all eaves and low-slope edges.
- Inside every roof valley.
- Around the chimney base and skylights.
- Encircling all plumbing vent pipes.
Synthetic underlayment then covers the rest of the bare deck. Our teams prefer this modern woven material because it resists tearing far better than old-school 15-pound felt paper.
Step 7: Starter course and drip edge
Metal edge flashing and starter strips form the crucial first line of defense against wind and rain. Our team installs aluminum drip edge along all eaves and rakes to guide water cleanly off the roof and into the gutters. The Federal Housing Administration (FHA) mandates this specific flashing to stop water from rotting the fascia boards.
We then nail down a dedicated starter shingle along the leading edge. This specialized strip features a highly aggressive factory adhesive that locks down the first row of field shingles, stopping extreme winds from lifting the edge.
Step 8: Field shingles
The primary shingle installation moves systematically from the bottom edge up toward the peak. Our crews follow the manufacturer’s precise nailing pattern to ensure the wind warranty remains valid. Direct fastening into the reinforced fabric strip on architectural shingles provides incredible hold-down strength. We use a standard application of four nails per shingle, totaling about 320 nails per square.
| Wind Zone Type | Required Fasteners | Nails Per Square (Average) |
|---|---|---|
| Standard Inland Area | 4 Nails Per Shingle | 320 Nails |
| High-Wind / Coastal | 6 Nails Per Shingle | 480 Nails |
High-wind coastal zones dictate an upgrade to a six-nail pattern. Our specialists use this heavier fastening schedule to guarantee maximum resistance against severe storms.
Step 9: Ridge vents and cap shingles
Hot air needs an escape route at the very top of the structure to prevent attic moisture buildup. Our roofers cut a slot along the peak and install a low-profile ridge vent, such as the Cobra Exhaust Vent. This essential component provides the necessary net free area (NFA) for proper air circulation.
We then fold specialized cap shingles over the vent and any hip joints. The finished aesthetic looks great while keeping blowing rain completely out of the ventilation slot.
Step 10: Flashing and penetrations
Metal flashing manages the water flow wherever a roof meets a wall, chimney, or skylight. Our technicians install fresh step-and-counter flashing to ensure these notorious leak zones remain watertight. New rubber pipe boots slide over all plumbing vents to seal out moisture.
We seal these metal transitions using advanced tripolymer formulas like Geocel 2300 or OSI RF140. These professional-grade sealants bond aggressively to damp surfaces and flex with temperature swings, outperforming traditional roofing tar. Our policy is to only reuse existing flashing if it is heavy-gauge copper or lead in perfect condition.
Step 11: Cleanup and magnet sweep
Returning your property to pristine condition is the final physical step of the job. Our ground crew removes all landscaping tarps and carefully pulls the Equipter buggy away from the house. A standard tear-off scatters up to 10,000 old nails, making a thorough sweep completely critical.
We run high-powered neodymium magnets across your driveway, lawn, and garden beds. The team typically performs this sweep two or three times to catch every hidden fastener. We then uncover the interior attic vents and haul the dumpster away from the site.
Step 12: Final walkthrough
The project wraps up with a joint property inspection to ensure you are completely satisfied. Our project manager walks the perimeter with you, reviews the finished roof from every angle, and answers any maintenance questions. Warranty registration paperwork is handed over to confirm your long-term protection.
We provide a complete photographic record of the decking repairs and installation phases for your files. Most standard Connecticut homes finish in just one to two working days, while complex roof geometries can stretch the timeline to three.
What surprises homeowners
The sheer speed and strict cleanliness of a well-run crew usually leave the biggest impression. Our standard is to leave the property looking better than we found it. You should be able to see your finished roof at the end of day two with no debris, no nails, and no damage to your landscaping.
If you’re planning a replacement, get a free estimate and we’ll walk you through these roof install steps for your specific property.
Frequently Asked Questions
Do you replace the underlayment too? ▼
Yes. New synthetic underlayment goes on with every tear-off, plus ice-and-water shield at eaves, valleys, and around penetrations.
How do you protect my property? ▼
We tarp landscaping and windows, stage a dumpster on plywood in the driveway to protect the surface, and do a full magnet sweep at the end to catch every nail.
What if you find damaged decking? ▼
We photograph it, show you, and replace it. Most estimates include an allowance for typical decking replacement — larger repairs get quoted as we go.
Ready to talk to a roofer?
Read about our roof replacement service or get a free estimate.
Related Guides
Architectural vs. Designer Shingles: Which to Choose
Compare architectural and designer shingles on look, cost, warranty, wind resistance, and resale value to pick the right upgrade for your CT roof.
Best Time of Year to Replace a Roof in Connecticut
Fall, spring, or winter? See the seasonal tradeoffs for replacing a roof in Connecticut and why waiting can risk winter leaks and ice dams.
Full Tear-Off vs. Roof-Over: What's the Difference?
Should you tear off or roof over? Learn the code and warranty implications and why full tear-off is usually the right call in Connecticut.
How Long Does a Roof Replacement Take?
Most Newington roof replacements finish in 1–2 days. See how size, complexity, and CT weather affect your timeline — and when single-day is possible.